Monday, July 28, 2008

A Little Member Inspiration...

Have you been in the AC Bailey gallery lately and checked out all the great work we have in there? I have been getting a lot of inspriation in there from our members. Wow! We really have some great work in there! I chose a few that really caught my eye!

This first layout is from the Here and Now challenge. The layout was made by member shihtzu452. Jennifer did an awesome job with this challenge. I love how she drew attention to the two photos using an arrow and the crystals. But, I think the best part is her title! Love it! Leah (chicsrapper) created this layout, "capture". This totally caught my eye because it was about her. I am not good about getting myself into my scrapbooks and I think many of us forget to include ourselve. It's great to see that we don't forget about ourselves! Also, you need to get to the gallery and check out the detail close-up she posted of the corner of her picture with the flowers. VERY nice! I think I LOVE this one because I am a bag girl and this is really and truly a bag to LOVE! Carrie (carrymesouth) created this cute layout. I thought it was pretty clever to use the lyric sheet music page in the background. I also really liked her use of the Queen & Co. ribbon. Cute page!
Dara made this adorable card for her husband on their 11th anniversary. I am sure he loved it! I really like the colors and the big flower. Way cute!

The title of this layout really grabbed my attention. I just knew Susan (GBS) made this layout about her son, Jim, who is currently deployed with the military. I really like the simplicity of the layout. It makes quite a statement.Finally, I chose this layout by AC Bailey owner, Erica. I absolutely LOVE the picture here! We get to see everything from Dallas' perspective. Isn't it cool? I really like the digi elements she added too. They are simple yet perfect, don't you think?
All this gallery browsing really got my creative juices flowing. I have been a mad scrapper for about 3 days now. I am quite pleased with all the things I have completed. I hope this little bit of creative goodness gets you into the mood! And, there's a whole lot more to drool over in the gallery!

Much love!
B-

Wednesday, July 23, 2008

American Crafts Keeler 2 Goodies

This month I got to work with American Crafts Keeler 2 collection. I'll admit at first I was a little intimidated by the colors and patterns, but once I started creating, I loved the fun "girly" colors that they had and inspired me to scrap some pages of my cute nieces. Like those buttons? Isn't it nice how they match the papers? I made them! I punched circles out of thin cardstock then punched another circle to cover the circle. Then use a glossy medium, I used glossy medium by Ranger. Once it is COMPLETELY dry, I used a paper peircer to poke holes and then stitch them on like regular buttons!


In this layout, I covered the Jewelry Box Thickers with some Ranger Stickles.

Then I got some Dreamstreet blank chipboard book pages and made this cute mini album about my neice Jade. I also made some "buttons" for this but I also made some fake epoxy stickers to match. I just used a Uniball pen to doodle some shapes then cut them out leaving a little border and covered in Glossy medium. I love this stuff!


Tuesday, July 22, 2008

A Little Daisy Bucket and Pink Paislee treat!


Hey guys! I have had a blast playing with my goodies for this month! I am especially excited to share with you the card I made. Not because of the card, but because of the envelope I made. I totally made my own pattern from an old worn out envelope I had. I had never done that before so I thought I'd give it a try. It was actually pretty easy too! I used the Daisy Bucket Playlist papers for this. They worked great!

Here are my instructions:

#1 -- Carefully take your envelope apart so that you don't rip it. Don't worry if you have a few "little" rips. You just want to make sure that you can still trace it to make your pattern.


#2 -- Trace each section of the envelope you took apart. I traced the main section 1st and included the top and bottom flaps. Mark where the flaps fold.

#3 -- Then, I traced one side. Leave a little extra -- about 1/4" on the side that will attach to the main section. You can use this piece for both sides by simply flipping it to fit the appropriate side of the main section.

When I was finished tracing everything, I had two pattern pieces.


#4 -- Trace the main pattern piece onto the paper you want to use. Cut it out. Fold the top flap and bottom flap where you have them marked.

#5 -- Trace the side piece. Make sure to flip the pattern over when you trace the opposite side. Cut it out. On the side that will attach to the main section fold about 1/4" of the paper so you can attach it.

#6 -- Attach the folded sides of the side sections to the main section.

#7-- Then, run a line of adhesive along the edge of a side section so that the other side section will connect to it in the middle.

#8 -- Use adhesive to attach the bottom flap to the adhered side sections.

#9 -- Once you finish your card and place it in the envelope, you can adhere the top down!

Card instructions:

#1 -- Cut your cardstock to the size that will fit your envelope. Then score it where you want your fold to be.

#2 -- Cut a piece of patterned paper that will fit both sides of the card. Using the paper with circles, cut around the circles to create an edge that will show up on the background paper.

#3 -- Add your sentiment.

#4 -- Doodle around the edges and add chipboard button.

#5 -- Stick it in the envelope and mail it off!

I also made a layout using this paper. It is really quite versatile and the colors work well with a lot of my pictures. This layout is about my oldest daughter and her love of the Fightin' Texas Aggies! (Sorry Becky! I know you are a Tech girlie!)


On this layout I also used the Prima Dude rubons and chipboard buttons. Although they are from another manufacturer completely, they worked really well with the Playlist papers! I love how this layout turned out. So much so that I still haven't put it in an album yet! It's displayed on a shelf!

And finally, I played with some Pink Paislee. Can I just say now that I LOVE this company? They are so fresh and have some great papers and products. You definitely need to get in the store and check them out! I used my Pink Paislee Office Lingo papers on a Bo Bunny Word Book. There is also a little Maya Road, Fancy Pants, Making Memories, and lots of craft ribbon on this one! Let's just say I had tons of fun with this! You can see more pictures of this in the gallery. Look for it in the Pink Paislee section. Thanks for looking! I had a blast this month!

Monday, July 21, 2008

Member Spotlight -- April Ordonez!

April Ordonez (aprilor) has been a member of AC Bailey since February 2007. We love her great attitude and fun spirit! And this girlie is talented to boot! She does a little of everything from cards to digi scrapping! So, let's get to know her a little better!

I know some of us know you pretty well, but for the new members out there, tell us a little about yourself!
Ok, well, I’m April a wife, mommy, scrapper, and diet coke addict! My DH and I will be celebrating our 10 year anniversary in September, we have two little guys: Cassius (aka Cash) who is just over three years old and Kayden (aka Bubba) who is just over a year and a half. I’ve been card making and altering art since August 2006, scrapping since January 2007, and just recently started digi scrapping and am completely hooked. That’s really me in a nutshell, I’m a simple girl who is a simple scrapper!

When we first met you really caught my attention. You are the master card maker! I loved seeing all your cards. How did you get into card making?
Well I “was” the master card maker, but boy now that I don’t do it much I struggle at it, I suppose it’s like anything else that you put down for a while. I first got into card making through a friend of mine who is a CTMH consultant, she showed me the card kits where you basically get a bunch of pre-folded cards and stickers and you design them using a guide sheet (basically a make-and-take in a box). I thought it was fun and decided to buy a few stamps and papers and that was basically the beginning of my addiction

You are also known to be a stamp queen. What is / are your favorite stamping techniques?
LOL stamp queen – I’m really not! But the stamp technique that I love the most is stamping an image and coloring it in using odorless mineral oil and blending stumps. Not only is it fun but it really creates a beautiful colored image that has highlights with little effort. My favorite inks are stazon for stamping when you want to color an image in and well the chalk inks just ROCK when you have an image that doesn’t need coloring in. Every stamper/scrapper should have those in their stash!!

You are a great traditional scrapper, but lately you have taken up digi scrapping. And, you are quite fast at it too! What was it about digi scrapping that really appealed to you?
I have always love Photoshop and have dabbled in it years ago for my job so using that program with scrapping is just something that “clicked” with me more than traditional scrapping. I love the clean and crispness that digi scrapping gives and the fact that you can use the elements over and over again without feeling like I’m hoarding supplies. But also I really love being able to manipulate my pictures, papers, and elements and still if I decide to design my page differently none of the elements are ruined. Not to mention you can alter all the elements to fit your pictures or theme. Also, I guess a reason why I scrap fast is that I don’t like to let myself over think a layout because when I do those are the layouts I like the least in the end.

I have also noticed that you are SO FAST when it comes to completing a challenge. What process do you use to get things done in such an efficient and quick manner?
LOL that’s my OCD shinning through. Really I’m probably not your “average” scrapper because I have things all sorted/planned before I even sit down to scrap. I have all my photos I want to scrap copied into a separate folder on my computer, and also have the papers/elements that I want to use for those photos planned out (mostly). So come time to scrap a page I have everything in a personal-made “kit” so I grab it and get busy J When it comes to a challenge I just sort through the pictures/planned pages and use the ones that correspond to the challenge and alter it to fit the needs of the requirements. I know that it’s not normal to scrap like this but for me being super organized is what makes me a happy scrapper LOL

If I had to guess, your scrap space is pretty organized. What does it look like when you are in the middle of some creative goodness?
Well my scrap space is my dining room table so come scrap time I lug all my supplies out from my scrap closet for the particular layout I’m working on and pretty much make piles of alphas, paper, elements, etc. I have to clean up as I go along as well, it bothers me to have chaos around me while scrapping so I keep my trash bag handy and put items back right away after I’m done with them.

Are you a scrapper or an artist?
I am definitely a scrapper – I am no where near being an artist. Although like an artist, I enjoy the process of creating and probably scrap more for own creative outlet vs. creating memories (which I’m doing in the process anyway). So while I’d love for my boys and their families to enjoy my albums years down the road, if they never do look at them twice I’m fine with it because I had a blast creating them, and that’s what matters to me most at the moment.

If you couldn’t scrap, what would your hobby be?
Oh boy, I don’t ever want to think of that LOL. I suppose if I couldn’t ever scrap again I would get into sewing. I’ve always been intrigued by it and have dabbled in it a bit. I would love to learn how to make those cut little fabric dolls and toys.

Finish this sentence:
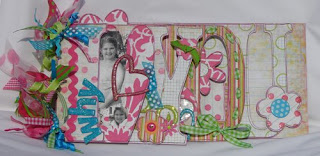
I feel happiest when I capture new photos that are just so cute and fun that I am itching to scrap.
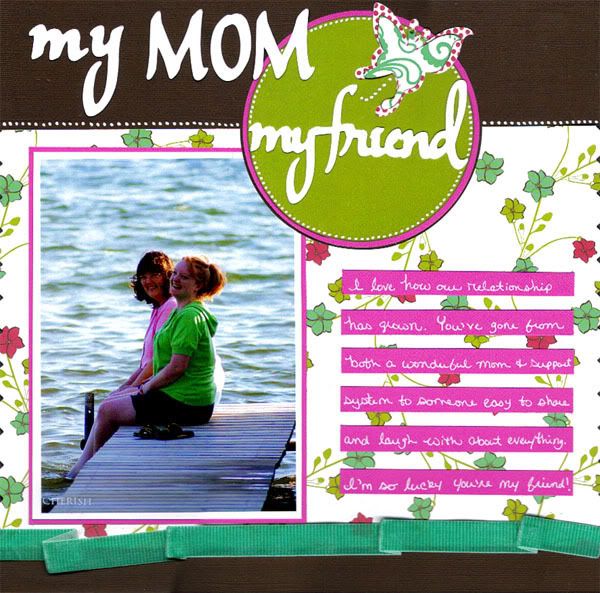


Friday, July 18, 2008

It's CHA Weekend!

I have always longed to go to CHA. My best friend is on her 2nd trip there. Erica, Jess, and Gail are there. I must admit that I am JEALOUS!!! I am dying on the inside knowing that I am missing out on all the glorious, yummy new stuff around each and every corner. I wouldn't even care that I was running into people left and right, standing in long lines, or that my feet would be throbbing at the end of the day. I just wouldn't care one bit. Can you just imagine all the goodies in that vast building? I have posted some sneeks of a few things including Sassafrass Lass (I am in love with them!), American Crafts, Making Memories, Tim Holtz, 3 Bugs, and a few others on our Community Forum. Lots of delicious goodness there.

Since many of us are sitting on the sidelines this time around, we decided to at least have a little fun while the pics of CHA trickle back to us. We are having a mini crop this weekend and you are all invited! We will have a few fun challenges and we'd love to see what you come up with and post in the gallery. We'll even have a few games. So, get that paper, scissors, and glue ready for a great time!

Much love!
B-

Thursday, July 17, 2008

Crate Paper Sweet Branch

You have been seeing a lot of the awesome American Crafts Keeler Papers, so let's switch gears a bit and explore some more mellow papers, i.e. Crate Paper Sweet Branch Set. I love that you can go totally girly with these papers, or keep them gender neutral since there is a great mix of flowers, geometric shapes and colors in this set. And the little buttons are so cute, and well made. They are a great way to add some dimension to your projects. And the die cuts are great too, they include journaling spots, flowers and some titles, or quotes.

Friday, July 11, 2008

American Crafts Keeler 1

I will admit, as the other design team girls have, that the patterns on the American Crafts Keeler 1 paper set were a little bolder than I was used to using. I am pretty conservative, so this was a great challenge for me, and I am always up for trying something new and different. Over the last week or so we have received some great tips on how to use these vibrant colors and patterns and we hope to have inspired you to want to try them yourself.


One thing that I did like about this paper set, as you've heard before, is the TEXTURE! The embossing is beautiful. One sheet of paper in the set has big embossed roses- I decided to go for a more subtle approach and used the reversed side of the paper which I had sanded so that you could see the rose print. So many possibilities when you use both sides of the paper! Here are a couple pages that I made using the Keeler paper set and embellishments and some fun Basic Grey Hip alpha chipboard letters.

Have a great day and happy scrappin'!
Becky


Thursday, July 10, 2008

A Card Sketch Challenge!

Are you all having a great time at Summer Camp? We sure are. Lots of fun people and challenges and prizes at the end- what could be greater?! Thank you, everyone, for helping us to make this go so well.

As you know, today is the day for our next challenge, and I'm up!! This will not only be a challenge for you, but was for me as well. You see, I have never done a sketch before. Not a "real" one anyway. Sure, I've doodled on paper a few time when trying to work out the details of a layout but never anything that I really had to show anyone and never a sketch that I made on the computer. So, here is my first attempt- in Microsoft Word, no less, since I don't have Photoshop! I don't think I'm ready to do this professionally, but it's pretty good for a first try, though, wouldn't you agree? We can't wait to see those cards you come up with! Have fun!

Here it is- a square card, but, as always, you can modify the sketch to fit your own style.


Posted by Becky

Wednesday, July 9, 2008

More Halstead 2!

Yep, I had a chance to play with this paper set too... remember these beautiful layouts that Jess made?!  Just gorgeous stuff!

Truthfully, the bold graphic and color kind of intimidated me a bit at first.  I don't usually gravitate towards those kinds of papers.  But for some reason, the funky fun of these papers really caught my eye, and I knew I wanted to try them!

When I got my hands on them, I admit... I was stumped... even could say I had hit a creative wall. And I think it was the bold graphics that had done it.  I even had to leave it laying out on my table for a night.. you know, just to warm up to a bit.  Glance at it now and then when I walk in the office.  Playfully throw other embellies to the pile to see what direction I can get a layout heading.  So, after a full day of circling my scrap table, I sat down to create!! 

In amungst those bold graphic prints and hot pink colors were some beautiful papers.  These two were my fav's!


And once I started pulling out some of these hidden gems and discovered some beautiful blue, green and "tealy" colors.  I started to create and there were things flying everywhere! ;)  It was so much fun to use these more subtle papers and take them up a notch with some hits of the bold graphics and bright colors!  

I am seriously impressed with how vesatile this paper set is, and how many different looks you can achieve with it!  And THAT's what I really like about it.  You can create 3 or 4 layouts with it, and you don't really get the "oh, I just used the same papers on 3 layouts" kind of feeling. KWIM?

Yep, after a bit of a rocky start, my relationship with these papers blossomed, and I created these:


Thanks for stopping by!

Amanda

Monday, July 7, 2008

"In the Mood," anyone???

Hehe...sorry, I couldn't resist using that title!! I got a new cd to play with this month and I...am...lovin' it!! It's the "In the Mood" cd from Digital Scrapbook Memories and it is absolutely loaded with goodies!! It has fun little categories like “Festive,” “Playful,” and “Love.” But don’t get caught up on the titles…just because something is in the “Love” category doesn’t mean that you have to use it for a wedding or Valentine’s day layout! Just to illustrate that point...I grabbed things from a bunch of different folders for this layout!! I used a cool, graph-like paper from the “Love” category and added some fun little elements from the “Playful” and “Festive” folders to accent it. I used some circle stickers (found in “Festive” sticker folder) down the side of the photo and grouped them together to make them one single element and then added a little drop shadow. I grabbed a piece of orange paper and used the cookie cutter tool to make the journaling spot and then added the fun stamp from the Playful category. The light brown paper that I used for the journaling is from the “Love” category and I added lines from the “Festive” folder to finish it off. The font that I used was just a freebie from CK called “Ali.” And finally, the little date stamp is from the “Playful” folder. Quick and fun little summer layout!!


Since my “Summertime” layout had things from a lot of different folders, I thought I’d try making one with just the elements from one folder…sort of like using a kit to make a layout. All of the papers and elements on this layout are from the “Love” folder on the “In the Mood” cd except for the “love” word art sticker that I made using the CK Ali font. The picture originally had my DD making a wish and blowing on a dandelion but I used the clone tool and got rid of that and added the fun swirlies. I liked the whimsical feel that it added to the picture. The hardest part about doing this layout was trying to keep myself from overloading it all of the really fun little hearts that are on the cd!!


And...I also had some seriously gorgeous papers from American Crafts to work with this month so I thought I'd share one of my hybird layouts. The papers are from the Amplified collection, Halstead 1, and pictures just don't do them justice!! I loved Jess' tips about how to use smaller pieces of the papers so that you don't get overwhelmed by the bold patterns. But, I sort of went the opposite direction. I embraced the patterns especially "The Twist" paper...love that!! I used it for my background on the layout. The branch element and little paper flower are digital elements printed from the Digital Scrapbook Memories "Playground" cd. I just handcut them and added a little Stickles for a bit of sparkle. And I can't remember the last time I fell in love with a ribbon like this!! I adore this stuff!! It's called Halstead 3 from American Crafts...gorgeous!


Well, I could go on and on about those AC papers but I'll spare you...I think you probably get the idea...they're gorgeous and I love them. hehe!! Thanks so much for stopping by!! I hope I've tempted you a little and maybe even put you..."In the Mood." (I know...boo!! Bad pun, but really, did you think I could resist that??)


Have a great day!!
~Phoebe


Sunday, July 6, 2008

July Sketch Challenge

Hi All!  I feel the need to tell you that this was the first sketch I have ever created.  I know some people like to sketch out their layouts before they start scrapping them, but I have never been one of those people.  For this sketch, I had done a layout first and took it and made the sketch from it afterwards. 

So, now I'm thinkin' I should really TRY to be like those people who sketch first. Wouldn't it be easier to create a layout if you already had an idea of what you wanted it to look like in the end, rather than just start cutting paper and grabbing elements and like I do all of the time, rearrange and rearrange until I come up with something I like.  *whoa... rambling a bit...* What I'm saying is, I think I might grab a pad of paper, pop it on my scrap desk and do a little doodle before starting my next layout.  I think.... well, I hope that this will save me a ton of time.  I'd like to hear some opinions on "sketching first".  Does it work for you?

Here is the sketch that I created from a layout that I had already made:                                          


Ok, that's a bit of a bummer, the border of the page doesn't show up... hmmm... maybe I'll just give you a link to check it out in the AC Bailey Gallery if you want.

Don't forget, you will receive Summer Camp points for completing this challenge, so after uploading your finished product to the gallery, make sure you link it in the Sketch Thread on the message board!

AND, I will be randomly choosing a winner from all of the completed layouts, and that person will receive a RAK from me!  YAY!

Have fun with it!

Amanda


Friday, July 4, 2008

Have a GREAT 4th!

Everybody seems to love the 4th of July around here. Heck, for years my sister thought the fireworks were just for her since it was also her birthday. She turns 31 today. I won't burst her bubble yet and tell her that the fireworks aren't part of the party. KWIM? :)

How do you celebrate the 4th? Are you the fire cracker of the party? Do you enjoy quiet time with the kiddies? Are you out enjoying the weather? Whether you are in the house, at the pool/beach, or in the backyard grilling, we 'd love to see what you do to celebrate and relax. So, get that camera out, be sure to take lots of pictures and GET THEM SCRAPPED! (I am so bad about letting them sit for too long...) We'd love to see what you do with them too. Leave a comment here with a link to your scrapped page. I'd love to feature some of you here on the blog and there might just be a drawing for a nice little RAK too! Can't wait to see what you all do! Have a great holiday!

Much love!
B-

Thursday, July 3, 2008

Let's be Bold!

So you’re browsing through your favorite scrapbook store and out of the corner of your eye you see it… bright, beautiful, incredibly detailed patterned paper that you absolutely must have! You don’t know why, but you are so drawn to it, it’s in your cart and paid for and you’re out the door.

And then you get it home,

And pull it out to admire once more,

And it hits you… what on earth are you going to do with this stuff?!

I have to admit that’s how I felt at first about the beautiful Halstead 2 line from American Crafts.


I adore the colors and the design, and I knew I had to have it to play with, but it’s so funky I wasn’t sure where to start. So today I could really gush to you about how beautiful this paper is in person (which it IS, what you see online really does not do the texture of these papers justice!), but rather I’m going to share with you three tips for working with bold papers such as these, in the hopes you’ll take that leap with me and see what you can create with them too!

Tip # 1: Downsize
Less is more when working with bold and busy patterns. Using just a little bit can really enhance your layout and give you lots of detail. I used only a few scraps to add some touches to the layout to the right, and found I didn’t need much else.


Tip # 2: Work outside the lines
Sometimes when a pattern is so bold, you feel as though you must keep to the lines that are already “drawn” for you and get stuck trying to create around it. Not necessary! An advantage to a really bold design is that you can cut it several different ways, and end up with several different, yet coordinated, pieces. I used the boldest of this particular paper pack to create the flowers on the layout to the left – taking it from over-powering to just the right funky touch.
Tip # 3: Don’t be afraid to cover it up
When a pattern is so beautiful, it can be hard to design the layout around your photos rather than the paper. Keep in mind that it should be used to show off your photos, not the other way around. A good rule of thumb to make sure this is the case, is to coordinate colors in your photo(s) with one or two found on the paper you wish to use. While we mostly do that when Scrapbooking anyway, it’s extra important when the colors are so bright. Don’t have any photos that match? Convert them to black and white. I happened to get lucky with this photo of my Mom and I in pink and green.


So there you have it! I hope if you’re a little nervous about papers such as these the tips above inspire you and give you the confidence to give them a try. Once you start playing with these and get used to it, you’ll have all sorts of new and fun layouts to show off!

Have a wonderful and safe holiday weekend!

All the best,
Jess

Tuesday, July 1, 2008

July Challenge Is Up!

For the July Challenge and first Summer Camp Challenge, I want to see some fun water layouts! It doesn't matter if they're pool layouts, lake layouts, water skiing layouts, even babies in a bathtub, as long as the theme is "water fun". However, there is a twist, in honor of Independence Day, your layouts must have at least 4 pictures (any size or shape), 4 circles , 4 brads, and have some red, white and blue(not all red, white and blue, just a little hint will even work). (cough,.. try July KOTM. cough..cough..free shipping on the first...cough..cough) I hope I'm not being too confusing so if you have any questions! I can't wait to see what you come up with and I'll post mine on Wednesday!
Participants go into a drawing for a RAK from yours truly at the end of the month. Also, don't forget about the Camp points you'll earn too!

July KOTM, Free Shipping and Summer Camp!!

Boy, oh boy do we have a lot of news to tell you about today!! First off, check out the amazing July Kit featuring goodies from My Minds Eye 29 Street Collection and beautiful papers and embellishments from Jenni Bowlin. Includes 8 double sided papers, 2 pattern papers, 24" of two tone grosgrain ribbon, 12" of ric rack, 6 Felt Buttons, 2 transparencies, 2 diecuts, 4 chipboard butterflies, 3 JB tickets and a Making Memories Spiral Journaling book. Get it today before it is gone!!


And just a reminder - today is FREE SHIPPING DAY!!! Woo Hoo! And there are lots of new goodies in the store from My Mind's Eye, Scenic Route and October Afternoon.

And finally, Summer Camp started today. For all the details and to register check out the forums!

LinkedWithin

Blog Widget by LinkWithin