Thursday, February 26, 2009

Member Spotlight-Michelle Pokorney


1. Tell us a little about yourself and your family? I met my husband Jeff of nearly 11 years on a blind date. We moved in together after 3 months and got married in Vegas 8 months after that (shotgun wedding??? it was because he was deploying with the Air Force, getting out upon his return, and I was scheduled to move shortly after he returned). We have a VERY beautiful and intelligent 5-yr old daughter who keeps us on our toes and is my main scrapbooking inspiration.
2. How and when did you start scrapbooking? Jeff and I went to Africa on a 3-week safari in June, 2002. When we returned with 17 rolls of film, a friend of mine hosted a scrapbooking party to help me get started and I've been hooked ever since.
3. How would you describe your scrapbooking style? Ugh…I never know how to answer this question. I think the best way to explain it is to say that I'm linear and geometric...which probably comes from my college major (Math). My husband laughs at me because I can't even put my photos on an angle...
4. How often do you journal? Is it important to you? I used to NEVER journal until I got a mini scrapbook from one of the teachers at my daughter's daycare. She wrote comments about misc artwork, photos, and events during the year in her class. The journaling was hand written on address labels, and when I read it, I cried. The journaling told stories I'd never noticed or even thought about in the art work and projects my only daughter created. The one with the most impact was pointing out that Erica was trying to write her name on one of the projects…the teachers usually write each child's name down so they know who the project belongs to. Erica saw this every day and tried to do it herself. It made me wonder how many projects I threw away (no, I don't keep them all) with her "name" that I had never noticed. It was then that I realized how important journaling is…it's the little things that people might not remember or even realize if they aren't written down, and sometimes the little things have a BIG impact or meaning. Now I try to journal *something* on every layout. Some times I journal as basic as when, where, who; and other journaling will have a longer narrative included.


5. Do you have a dedicated scrap space (room)? What does it look like right now? Yes, I have a scrap room. Up until the week before the New Year, it was more of a war zone that had to be maneuvered thru. I purged and cleaned and organized to prepare for the AC Bailey online crop and now I can actually work at either of the two tables in it. I'm resolving to clean up after every project I work on to keep it organized this year…oh, and my incentive is that I get to go on an out-of-state retreat if I'm able to keep it clean (yeah!!!).
6. What are your "go to" tools or supplies when you scrap? I am an idea book junkie!!! That was most of what I had to purge in my room. When I try to "create" a layout in my head, it never turns out quite as I dream it. But I love looking thru books and finding aspects from several layouts (general layout, techniques, colors, pix placement, etc) and then tweak it to make it my own…
7. Where do you start when you get ready to create-sketches, supplies, photos....? I usually start with the sketch and then pick the photos and the supplies. That said, sometimes exciting new supplies call to me and other times I'll want to scrap a particular photo or event if I'm in a particular mood.
8. Are you a scrapper or an artist? Definitely a scrapper…


by: C. Mercer

Tuesday, February 24, 2009

Digital Scrapbooking for Beginners

I have been scrapbooking for 14 years now. I love cutting my paper, inking my edges, and leaving physical evidence of my art process all over my craft room. However, I've also tried my hand at digital scrapbooking. I am no expert here, and while I am digi scrappin I feel as I am a beginner all over again. For my February supplies I got to use one of the Digital Scrapbooking Memories Beginner CDs. This cd is awesome. Not only does it have a digital kit full of papers and embellishments, but it has pre-made pages that you only have to add a photo and some journaling like I did here: There are also instructional videos on the CD showing you how to make the same pages that they have pre-made for you. So as you're learning digi basics, you're also creating a layout. After you get comfortable you can play around and make you're own layouts using the included kit like these:

So, if you've been wanting to try digi but have been afraid to, I challenge you to get one of these CDs and try it. It is a big help in easing you into this whole new world of scrapping we know as digi.


Monday, February 23, 2009

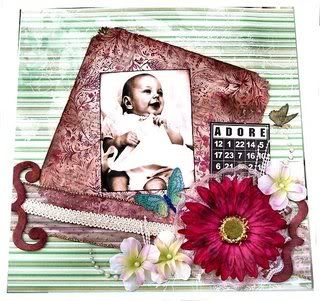
This is the time of year many of us who scrapbook are starting new albums and finishing up old ones. I do much of the same, although I’m not necessarily working on the first page of my current album! My first layout uses paper from the American Crafts “Romance” collection, Bazzill diecut card stock, and Petaloo’s “FloraDoodle” foam flowers. The main piece in the center is a vellum sheet from Quick Quotes that works as a great “first page” introduction.

I have the journaling below the layout so that you can appreciate the sentiment—the writing is small and kind of hard to read—but if you choose to use it, please remember to credit the author—Patsy Gaul:


“My Family”

“This book is dedicated to my family, along with the dream that our sweetest memories will live on through these pages. We have lived together and loved each other. We have cried together and shared wonderful moments of laughter. We have shared secrets and joys, and many celebrations. We have cherished the unexpected surprises and precious moments that make us a part of the puzzle that is family.

Life’s music is forever changing and we may not remember each and every milestone or candid moment. My dream is, while weaving our stories and photos onto these pages, we will be grateful for the little things, and someday, looking back at these pages we will realize these were the big things after all.

We are all a part of the story. We are family… we have weathered the storms and heartaches life sent our way and we also rejoiced in the pot-of-gold at the end of many rainbows.

So I will continue to gather our story onto these pages with the hope that it will spark the memory of a special moment from another time. You are my family and a piece of my heart is tucked into each page. Your precious lives and sweet memories are part of who I am.”—Patsy Gaul

My next layouts were made using the fabulous February Kit of the Month, which I am addicted to! The first layout was fun because the kit was a love/Valentine theme with lots of pink in it, and with my wedding album done and no daughters, I struggled to figure out what to do with it. However, I realized that there is a way to make pages about boys using pinks and reds, as you can see in my “For the Love of my Boys” page below! The only product I used that wasn’t in the kit was American Crafts buttons in Chestnut.

Photobucket

Finally, I made a girlie layout for my “Girlfriends” album. This is an album strictly dedicated to the women—both friends and family—who have touched my life, even some who are no longer in it. Each two-page layout depicts a relationship with a woman that is important to me. The one in the layout below, entitled “Giulia,” is about my wonderful friend from Italy. Despite the miles between us, she is truly one of my closest friends, and I loved having the perfect pictures to make a pink and red layout with! I used nothing but the Kit of the Month and some Cat's Eye brown chalk—if you don’t already subscribe, maybe these layouts will inspire you to!

Photobucket

Have a fabulously scrappy day!
--Kathy

Sunday, February 22, 2009

Here Is An Open Challenge For All You Bloggers

My world is changing, I am taking a job working the night shift (10pm - 7 am)So to get ready I have been staying up later and later each day since Thursday last night I stayed up way late (5:30 am) to get ready for this transition. In my delirium I came up with a fun new challenge.

My challenge is to look thru the pile of leftovers and Choose 2 papers left from two different projects the trick is to say those don't match. then I want you to make a LO using these 2 papers no other papers allowed. Use your embellishments, ribbon and what ever else is in the pile from the original projects to make combo work. You can use scraps to make some of the new style circle flowers, but you can not just glue circles, squares strips or other shapes that have not been altered or worked in to embellishments of some type.

you will need a full sheet left from one project and a scrap that can be trimmed to at least 8 x 8. then I want you to take the handful of embellishment left from both projects and supplement with what ever you find and make this combo work.

as you see I used...a pastel light greens,soft golds and white, with and antique weathered paper with reds browns and tan papers. It was almost like June cleaver meets Tim Holtz.

Photobucket

I (Emma Hicks) have a nice little Prize for this challenge. Post to this thread with a link to the page you created. I will have my 3 yr old grandson draw one name.

Dead line 5:pm(pst) March 1st

The prize for this challenge is not from AC Bailey Designs and AC Bailey Designs is not liable in anyway with the Prize Emma Hicks sends to the winner. This RAK is not returnable or exchangeable for any other item. This is a personal RAK from Emma Hicks.

Thanks for playing a long

Emma

Friday, February 20, 2009

Just Making Do!

"Just Making Do" sounds like a good title for a song.
Especially since it is the one I feel like I have been singing all week. "Just making do" with my paycheck,.... cause it isn't getting any bigger. Just making do with the groceries we have, ...cause I hate shopping these days. Just making do with longer days since the school district decided to add 40 minutes onto everything. Seems we have to make up for the weeks of lost time when we had no power for during the ice storm. Just making do with the snow, cause winter isn't over yet,...here anyway!
Well, that "just making do" applied to my scrapping this week too. I had a GRAND time making layouts and such with my DT supplies this month. I got the Prima Hello Spaceboy collection and the colors and textures of these products are INCREDIBLE! I love the embossed papers, the shiny/muted shades and the metallic application to the paper as well as the epoxy shine of the embellishments- very rich looking and did you know Prima makes SPACEBOY flowers too??? (Check out the gallery next week for pics of layouts I did using THOSE!)
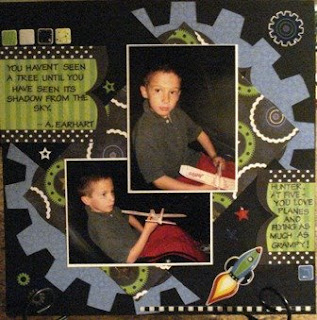
Anyway,...I was "just making do" with my layouts too! The first one that I call Helmet Head was so easy to make. I used a sheet of the Spaceboy paper and some scrap Bazzill cardstock for matting- I journaled along the matted edge and used a leftover Prima epoxy sticker (or a UFO) in the bottom right corner. I applied the three large coordinating brads to the right of the pic to offset the busy detail on the left edge and I was DONE,...almost! I dug out some AC sticker letters Erica had given me as a RAK (thanks Erica) and spelled out "Our Helmet Head" and then I used odd ball (just making do you know) AC thickers to spell out his name. Had no more "e"s or "r"s so I altered letters I did have to create these cause now-a-days you "gotta make do"....hehehe:)

The second layout, was also made from the same Prima paper pack. The kit comes with this one sheet of paper I found interesting and although I really wanted to use it I was at loss as to how. It had some cool stripe/dot border trim and awesome blue paper with a real neat (but subtle) pattern to it and some very large gear/cog thing on it but it also had HUGE black brackets and a BIG hole in the center. I guess you are supposed to use it like a mat and frame a pic but it did not work with the 4x6, 5x7 or odd in between size pics I printed, so to still use it, I decided to cut it all up and "just make do" I love how this layout turned out! Being frugal I used up most of my leftover epoxy stickers on this one as well. The words were added with tiny Mrs. Grossman's letter stickers that I got in the dollar bin somewhere and I LOVE them-sure wish I had picked up more than one pack of those! But,...I gotta make do with what I have and I think there is enough to do one more layout in that pack.
Not bad for a BUCK!
Oh, and don't worry about the picture quality. my camera isn't broke. And I promise I will retake these shots and post these layouts (looking a whole lot better than they do now) in the ACBailey gallery when I can. I was waiting for a sunny day to take decent pics outside but we have not seen the sun out in days up here in NH,.... so I took these inside with no flash! You get the gist of it right??? Afterall, I was "just making do" with what light I had to work with afterall!

Wednesday, February 18, 2009

Good Morning everyone, today I wanted to share a few things I made with my DT kit this month. I took the kit with me to CHA and worked on these projects in the hotel room in the evenings. I got to play with some October Afternoon goodies from the Detours line!

Here's a one photo layout I did with an old pic of my son. I love the detail a bit of hand stitching gives to a page, don't you? I was really happy with the way this layout came out!


And here's a simple cover I made to alter a pocketbook planner: (Gotta love Target's dollar store bins!)Now if I were just organized enough to use it...


And finally, here's a mini album I put together. The binding is a simple accordian fold and the pages are inserted between the folds. I strengthened the cover by using Bazzill Chip Brackets at the top and bottom, which were first painted, stamped and then covered with glossy accents.

Thanks for looking everyone,
Elisabeth

Sunday, February 15, 2009

Take note...

Every once in a while in our lifetimes, we experience those moments that we know are going to go down in history - those things we just know our kids are going to ask "Do you remember that, Mom?" Today I challenge you to take a moment and record your thoughts - I know that whatever your political leanings, you will have to agree that this was an historic moment for our country. So, I set a side a little time to record my thoughts and emotions that day.


I also printed out a copy of his inaugural address and included it in an envelope on the back side of the layout.

I guess in all my ramblings, the point I'd like to emphasize - we spend a lot of time recording the small {and large} moments in our families - our love for those around us, our heritage... what about some context for those things? What was going on around us at the moment? Were we happy go lucky without a care in the world?

We're living in rather turbulent times right now - lots of things are changing. And even though those things seem sharp and a little painful right now, time will fade those memories, and we'll try to recall just exactly what was going on at the moment. I think there are few recalled memories of my grandmother that intrigued me more than her accounts of living through the historical events of her lifetime - I also sat for hours listening to an "adopted" grandmother recount her experiences in London during WWII. What impressed me the most? It brought those times to life for me - and I admired how she spoke of what she'd learned... and I identified with her struggles.

So record your moments, the good and the bad, and you might be surprised, years from now... you'll want these memories, too!

Wednesday, February 11, 2009

Chatterbox and one of my favorite things

This Chatterbox Together collection was so fun to work with because of the cute patterns and coordinating felt and chipboard shapes. I love it because it allows me to do one of my favorite things to do on scrapbook pages: hand cut work. So, I did a little bit of that on this page I will show you. Cutting shapes and patterns from the paper is a great way to add your own embellishments and make a page truly your own. Once you cut the patterns out you can bend and ink and add sparkle or whatever might fit your need for the page.

I love the 3 dimensional quality it adds to a layout or card. Here is my page along with some details of the cut work.


Thanks for stopping by the AC Bailey blog today!
Have a great day! From Becky

Tuesday, February 10, 2009

February Card Sketch!

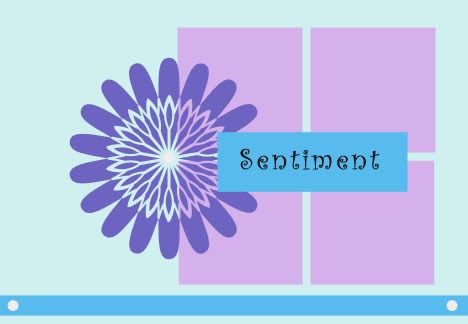
This month we challenge you to create a card based on the sketch below!


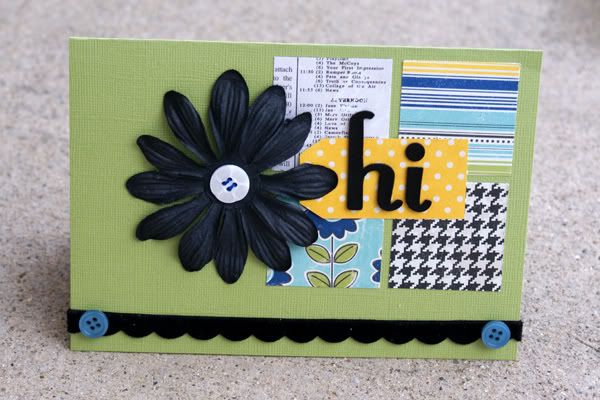
But - along with that we also challenge you to use at least four different patterned papers! Here's my example:


Should be fairly easy right? Right! Ready to stretch your creative muscles? Let's go! Stop by the community forum to take a peak at what our talented designers and community do with this sketch and to share your own creation. Can't wait to see you there!

All the best,
Jess

Saturday, February 7, 2009

Our First Digital Freebie!!

Hi, everyone!!  This month I had a really cute kit from the new digital store to work with called "Spellbound."  It has the prettiest blues and greens and my absolute favorite part of the kit...a wooden flower!  It's so darn cute!!  Anyway, I made some digi layouts and a hybrid layout using the kit but then I thought it would be kind of fun to make some non-traditional looking Valentines using the kit.  And after I printed them out, I was adding some glossy accents and stickles and I thought..."maybe I should offer these as a freebie??"  So I asked Erica and the wonderful designer, Jenn from Creative Confusion, if I could hook our blog readers up with the freebie and they both said yes!!  I put them on a sheet so that they're ready to print once you download them.  And here's what they look like:
I hope you like 'em!!  You can just click here to download.
I thought I'd share a digital page that I made using the kit also.
                                     
I used Leah's fabulous DT sketch for that layout.  I loved the sketch so much that I didn't really change it up too much. :)  And just to clarify, the "Spellbound" kit doesn't come with the alpha that I used on my layout.  I made the lettering by "cutting" the letters from the beautiful papers that come in the kit.  I think the "Spellbound" kit wasn meant to be more for Halloween since there are a couple spiders in the kit but I just wanted to show how versatile the kit is!  Who would ever guess that I used a "Halloween" kit for those Valentines and the layout??  So don't let the intended purpose of a kit stop you from using it for something other than that...whether you're using digi or paper supplies.  Use it for whatever you like!  And let me know if you have any trouble with the download...like I said, it's my first attempt so hopefully I got everything right! ;)  Have a wonderful day!!
~Phoebe

Thursday, February 5, 2009

Not Just for Valentine's Day


This American Crafts paper line is not just for Valentine's Day!! The paper line may have all the reds, pinks and magentas that signal the holiday but it is paired with a cocoa brown and a creamy beige that help make your layouts pop off the page. I loved combining polka dots and hearts and it was just perfect this photo that had a heart in it too. I love using Bazzill card stock as a base when the patterned papers have strong colors. After layering the papers, I cut a piece of acrylic sheet and stamped with StazOn ink and placed that over the photo. I painted a Maya Road Chipboard Border with Ranger Distress Paint and wove a gingham ribbon through it when it dried. I love layering flowers, so I grabbed some Prima flowers and mixed up patterns and colors - and buttons make great flower centers and accents. For my title I used American Crafts Poolside Thickers and inked them with Powder Puff Chalk Ink . The circles pattern on the paper made a perfect spot for a date stamp. I finished off the layout with journaling done with a brown Slick Writer.

And although earlier I mentioned that this American Crafts paper isn't just for Valentine's Day, it really makes up into some fresh and funky Valentine Cards. I struggle with cards sometimes because I am so used to thinking in 12x12, but these came together really quickly! I just love how the cocoa brown and cream contrast with the shades of pink! One of the things I loved about this paper was the circle pattern - I used a Scallop Punch, which lately sees to be my go to tool for cards and embellishing.
Wishing you lots of love - both given and received this Valentine's Day!
Dee

Tuesday, February 3, 2009

October Afternoon Hometown & 25 Things

Do you Facebook? I love it!

If you do, you might have recently been "tagged" in a challenge to list 25 Random things about yourself. What a great challenge for a scrapbooker! So often we might be stumped for journaling ideas when it comes to pages, but by just making a simple list sometimes... whether it is about ourselves, a loved one, or even a vacation... suddenly our ideas start flowing!

I was inspired to create a mini-album using the amazingly fun October Afternoon Hometown Paper set. This was so much fun!


This was also so easy, remember 3 rules of thumb when creating any mini-album and they will go together SO quickly for you:
  1. Use a coordinating paper set
  2. Use only 3-4 of the same embellishments
  3. Don't think every page has to be a mini-layout! Let it all come together as one.
Here's a few of the inside pages. :)


(I LOVE that crossword pattern!)


To see more pages of this album as well as list of supplies, come on by and visit the AC Bailey Gallery - or to share your 25 Things! We'd love to see you in the ACB Community Forum! There is no better way to jump right in and make new friends by listing 25 facts about yourself right off the bat. :)
I hope your month has gotten off to a great start. Happy Scrapping!

All the best,
Jess

Monday, February 2, 2009

October Afternoon/Weathervane

This paper pack fits its name perfect. October Afternoon-yes it reminds me of an October Afternoon. This paper is so easy to work with. It goes with just about every theme you can think of. It is perfect for fall and winter photos. On this layout I added some bazzill cardstock, bazzill paper flowers , some cute buttons and alot of love.
I really like the look of the circle papers, as you can see. Just something fun to do and give your layout a different look. This layout has some Basic Grey chip board corners to add some extra texture and some of those cute buttons. The ribbon is by American Crafts.

On this layout I made a tree and stamped a little owl and colored in with some markers. So fun! All of these products can be found at http://www.acbaileydesigns.net/ Have a great day!!!
by: C. Mercer


Sunday, February 1, 2009

February DT Challenge

Happy February! :)


This month I challenge you to document seven things in your life. Whether it be seven days a week, seven things in a year, seven things your daily routine etc. We'd love for you to come and play!


Stop by the ACB forum here:
To join us and have your chance at a wonderful prize from the store. We hope to see you there!
All the best,
Jess

LinkedWithin

Blog Widget by LinkWithin