Monday, December 29, 2008

Happy Holidays from Kathy!!

Christmas Day is always bittersweet for me. Although the “holiday season” is not officially over, that’s always how I feel. It’s like this era that starts in October has come to an end, and although many people spend Christmas Day entertaining and visiting family, we usually spend the day at home, relaxing, playing with new “toys,” and eating… However, one thing I thought about doing this year that might help with the post-holiday blues is spending time in my scrap room, going through pictures of holidays past.

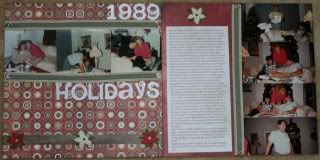
My first project is of Christmas 1989. It was a bittersweet year, as I said in the journaling, because while there were many wonderful things about that year, there were also some not-so-wonderful things that happened the day after Christmas. Ironically, I thought the subdued colors and elegant embellishments from the Basic Grey “Wassail” line (featured in the December Goodies Kit) were just perfect for reflecting my subconscious feelings about it all as I thought back to that year…
Kathy - Blog Layout

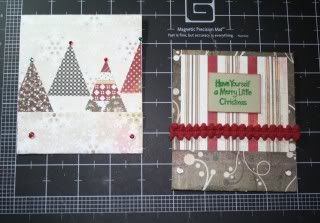
My next project using the same products was making gift card holders for a couple of gift cards I gave. Although these particular gift card holders were made specifically for Christmas, using different paper and embellishments can make them perfect for any holiday, all year round!
Kathy - Gift Card Holders4

To help you make these yourself, I thought I’d give you the basic instructions, because these are so easy and fun to make—especially since you can often use scraps, especially to decorate the front!

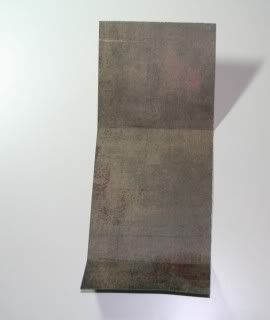
--Cut a sheet of paper 4”x9.5”
--Lay your paper in front of you with the side you want on the INSIDE facing up.
--Fold the bottom up 1.25”.
--Fold the top portion down at 3.5”.
Kathy-GiftCardHolder

--Insert one brad or eyelet approximately half an inch from the right and left sides in the center of the 1.25” portion.
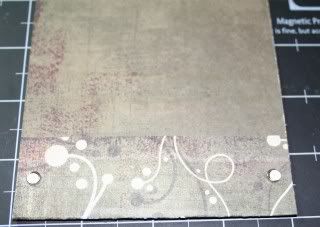
Kathy - Gift Card HOlder3

--When you fold down the top portion, approximately .25” will fit into the folded portion held together with brads or eyelets.
--Decorate the front cover in any variety of ways.
--Gift card will fit on its side in the flap created by the 1.25” fold.
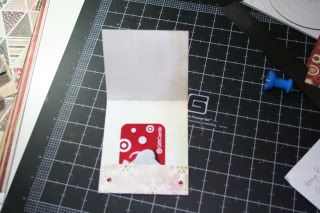
Kathy-Gift Card Holder2

Tuesday, December 23, 2008

Merry Christmas Eve Eve!!

I have been saying this all day and it has been confusing the heck out of my kids, but hey, I'm just as excited for Christmas as they are! Christmas Eve I can't sleep from the excitement of it all either so Merry Christmas Eve Eve! For Decembers projects I received Hello Space Boy from Prima. I know, not very Christmasy, but the reds and greens were perfect for the ornaments I wanted to make using acrylic shapes so this is what I came up with:
Next I used the Hello Space boy, some Bazzill stars, AC Vinyl Thickers, In Stithz, and Creative Imaginations Die cut papers to make these layouts of my DS. This set is very versatile because I used it for boy pages and Christmas items.


Happy Holidays everyone!


Wednesday, December 17, 2008

Be Merry Holiday Projects

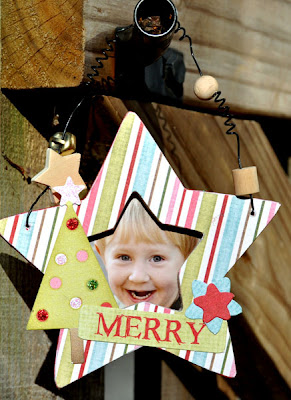
This set from My Mind's Eye is so much fun to play with! The first project I did started with some unfinished wooden ornaments I picked up at a craft store. These were super easy to make with the papers and the diecuts included in the set. And they make great gifts.


Instructions:

  1. Paint back side in red.
  2. Using base as your guide trace and cut background paper.
  3. Adhere to base.
  4. Add diecuts and stickles as desired.
  5. Add picture and tie ribbon to hang ornament.


Next I decided it was time to alter my 8x8 American Crafts album I have been using for my Christmas Album. And see the strip of papers I used - that is from the packaging! Talk about using it all!!!


Instructions:

  1. Using Binder as a guide, trace and cut out background paper and adhere to binder.
  2. Attach strip of paper as a border. ( I used part of the packaging as my strip)
  3. Attach die cuts.
  4. Stickle as needed.
  5. Add title.
  6. Adhere felt border between paper and cloth cover.


Tuesday, December 16, 2008

The Magic of Christmas

Christmas is such a magical time for me the light the glitter and most of all the feeling. People are different this time of year. I have not gotten my tree up, I have not wrapped one gift and I have not planned any lavish meals, but I have scrapbooked and made cards for those I love and respect. Below is a Page I did called "The Magic of Christmas".


I used the Bo Bunny Press Believe paper set and Bo Bunny Press Believe Cutout , ,Coordination's paper for the photo mat, Basic chip board shaper painted with Ranger Crackle Paint and glossed with Glossy Accents, 2 inch Bazzill flowers with bulk button centers. The words “the” and “of” are mounted on scrap pieces of Bazzill inked with Power Puff Mocha Mania and mounted on the page using Glue Dots .

This past holiday season AC Bailey has put together such beautiful Goodie Kits that I keep finding new ways to use even the scraps, and yes I have horded all the scraps from both kits.

I have made a Accordian album combining two sheet of Spice Bazzill, scraps from the December and November Goodie kits and the Rubon from the November Kit. I have never had so much fun melding two kits together before.


I have also made some cards that were a scraplift but worked so well with the paper from the December Goodie kit.


and last I made a card for a challenge.


We would love to see some of your inspiring works, Join us At acbaileydesigns.com and show case your work.

Have a Truley Happy Holiday Season!!
Auntie Em
aka Emma

Monday, December 15, 2008

A few Layouts...

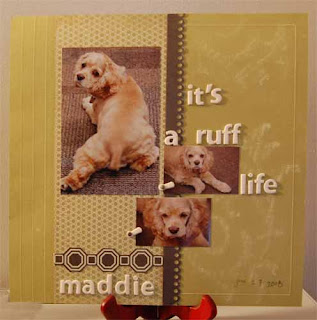
Hey everyone, Elisabeth here to share a few layouts and cards I made using some great paper from the Crate paper-Prudence line. I made this first layout for a friend of mine in Buffalo, and this is her adorable little cocker spaniel, Maddie. The title is made with Basic Grey Chipboard - I love this alpha, it has a great, smooth texture that takes to inks very well, and it even has little extras like phototurns! The background is Core'dinations cardstock; if you haven't tried this stuff, you really should, it's fantastic!


For this layout, I used the same chipboard alphabet and sponged ink over it for a muted effect and used my new "Slice" to create the three dimensional flowers:


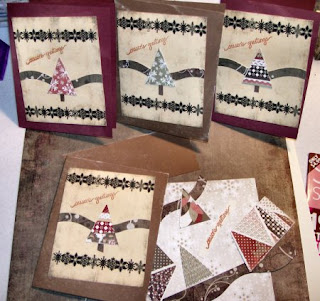
And here's a simple card set I made: Just some everyday cards, for when you want to say hello; I never seem to have enough of these on hand!


Thanks so much for looking and I hope you all have a wonderful, joyous Holiday season!

Saturday, December 13, 2008

Christmas Banner

Wow - this month is absolutely flying by.... where has the time gone?! Hope you're further along in your Christmas preparations than me! :)

Today, I'd like to share a few extra pictures and instructions for making the banner I put together using this fun, fun paper set:


The banner:


I started by gathering supplies. In my case, I used the paper set and raided my stash of goodies for the other stuff - there are a bunch of companies out there making those banner pieces these days. I chose to use chipboard letters, but you could just as easily use diecuts! :) I also realized at this point that I didn't have enough of each piece to spell my word.
So, I traced and cut a couple of extras from plain old chipboard sheets:
Cover each banner piece with plain cardstock and trim.

I then cut 5 circles with a 3-3/8" diameter, and 5 slightly small to fit on top, mounted on foam dots. Using the banner piece as a template, I traced out triangles to fit underneath for another layer.
You can see how they're layered here:

After assembling the individual pieces, I started stringing them onto the ribbon. There are knots in front to hold each banner piece in place, so they don't slide toward the middle.


the "I" and "T" are threaded through the top:


The "H" and "A" are on small stars, so I punched holes on either side to connect them to the banner pieces:


Hope this helps you get a better idea how to put it together!!

Thursday, December 11, 2008

Crate Paper Lemon Grass

One of the most long-awaited arrivals of product from the new AC Bailey catalog was undoubtedly the Crate Paper Lemon Grass collection. Just ask Erica how many times I bugged her about whether or not it was here yet :)

The patterns and colors of this set are so beautiful, perfect for fall pages and versatile enough to go with just about anything. It is cute, but also elegant. I loved being able to play with the paper, glitter die cuts and all of the other fun things in my kit for this month.

I love to make little cards, perfect for grabbing on the fly when you need to send a note to someone. These cards are 4x4 and use the Lemon Grass paper, brads, die cuts, glitter borders, some Creative Imaginations buttons, 4" Bazzill blossoms and stamps from Hampton Arts, all of which are available in our wonderful AC Bailey store. The box is something you can find in craft stores, and this one only cost me a couple of dollars and was so quick and easy to alter.


I'd also love to share with you one of the layouts I created using these same supplies. About two years ago my family and I moved from Boise, ID to west Texas to be closer to my husband's parents. Moving from Idaho to here we left behind our snowy mountains to come to a land that is so flat, and where we don't get much snow to speak of. We do, however, live surrounded by cotton fields which my husband likes to tell me look like snow. So, in honor of that, I created this layout, "West Texas Snow."


Thanks for stopping by our AC Bailey blog. Have a wonderful day!!
:)Becky

Tuesday, December 9, 2008

A Bit of Christmas Inspiration!

I had so much fun with my projects this month. I got to play with the Prima Peaches Hybrid CD and the My Minds Eye Be Merry paper set and I just couldn't stop creating!!!

Here is a hybrid LO that I created using one of the papers from the Prima Peaches CD - I removed the background from the digi paper and recolored the design and printed it onto clear transparency! I love the effect that came out of it. Before printing it I added some journaling to the paper and then just added a bit of Kaiser Craft pearls and details and voila!
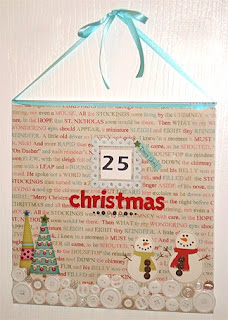
And my favorite project was creating this Christmas Countdown Wall Hanging. I used the My Minds Eye Be Merry paper set, one of the Clear Scraps acrylic frames, and lots of buttons! I love countdown calendars and I wanted something unique and also "nice" enough to hang on the wall and I'm really pleased with this one! My son loves changing the number each morning too!! The acrylic frames are super fun to play with beyond just adding a layout or photo inside of them!
For complete details on the above projects, as well as the other projects that I completed this month check them out in our gallery HERE

Thanks for stopping by and best wishes for a wonderful Holiday Season!
April

Sunday, December 7, 2008

Diving into Digi & Hybrid...nice and easy ;)

I know that digital scrapbooking can seem a bit overwhelming. So many technical terms and funny sounding things...clipping masks, opacity levels, blending modes...yikes, right??? But it doesn't have to be. And you don't have to know everything to get started. Keep things simple initially so that you don't get too bogged down in all the technical stuff. For this layout, I didn't use any of that fancy-schmancy stuff. Just my picture, lots of staples, and a couple other elements like strung flowers and some ric rac. For my shadows, I did a slightly advanced technique to make it look like my photo is raised a little but you can skip that part and just add a regular drop shadow. Using something like the staples in large quantities helps add a little interest without making the page too busy. Simple little layout but I really like the way it turned out.


And for some reason, hybrid can seem even scarier than digital scrapping! But when you start looking at your digital supplies as traditional supplies, it gets a little easier. For instance, on the "Peaches" cd, there are some really cute journaling spots and "stickers." I just knew that if those items had been right in from of me, I would've grabbed one of those journaling cards for my layout. So I just printed some...tada!! :) And I hate to waste paper when I'm printing hybrid supplies so I filled my page up and had some extras for later. Here's what my page looked like that I printed:

One little side note...I did adjust the colors a bit before I printed them. On the CD, they were mainly red and pinkish and I needed more greens and oranges. Anyway, once I cut my items out, then I was able to play with them just like all of my other traditional paper supplies. I cut the peach out of one of the journaling spots, added some stickles, and used Glue Dots to add a little dimension. Here's how the layout turned out:
See the journaling card with the extra peach on the top? I just cut the card in half and used it on either side of the photos. And the mat that I used to mat the center photo on is one of the journaling cards as well. I just added some little circles with a white pen and some dots of orange stickles...simple and fun!
I hope you were able to find a little inspiration and hopefully hybrid and digi doesn't seem so scary and overwhelming now. Hope you give it a try!!! Thanks for stopping by!!
~Phoebe

Saturday, December 6, 2008

I Really Do Believe!!

I grew up in a home where nearly every holiday was cause for celebration. My mother was crafty and always had a new decoration to show off; some new thing to hang up and remind us of the holiday to come. She was an amazing talent and Christmas was one of her favorite times of the year. She was the one who taught me about the magic that is created during holiday time - not just in the pretty things that make our homes look warm and festive but in the aura created through celebrating with family and helping those less fortunate. So I grew up "Believing"- in Santa when I was a young child and in the spirit, love and community of Christmas as an adult. I fell in love with Bo Bunny "Believe" the moment I saw it because of the beautiful plum and burgundy and the whispers of stars and snowflakes. Simplicity seemed to be the key when working with these papers, just like Jessica who raved about this line earlier - let the papers work for you - a perfect photo, some heartfelt journaling and embellishment here and there. I used Bazzill as a background paper and layered the Bo Bunny over it. For embellishments, I used the cutouts and made them look like ornaments, adding Prima swirls and Glittered Thickers ChipBoard for the title. This layout is a photo of me and my grandchildren a season ago - the antlers were being given away with a purchase at Old Navy - and we had a bunch of them. I wanted all the kids to put them on and pose----sure, on Christmas Eve, with presents stacked all over the place begging to be opened, get seven kids to pose prettily with their grandma who actually put on a Santa hat for the picture ......well, that did not happen. Everyone was whining and squirming and basically non-cooperative. Then I thought of my mother and "Believed" and I started to sing and the magic began....everyone started singing but the baby, the kids were putting on a performance for their parents and everyone was smiling and laughing and the memory of that special night will be with us always - and, although the antlers are long since gone - every year the kids and I do a sing fest on Christmas Eve!

I used my Bo Bunny Believe scraps to make this little "Tree" to hang in my hallway where I have a small wall. It's made out of Chipboard that I cut into a triangle shape -(the flip side is covered with Halloween paper, like a decorated Candy Corn). I adhered the papers with the Xyron Cheetah and added some Prima Crystals and used Stickles to add sparkle to the snowflakes


I found this word plaque in Marshall's - funny how that words takes on such a significance for me! Since I was in the holiday spirit I altered this word using papers from the Basic Grey Wassail collection - these papers were in AC Bailey's December Kit of the Month. I cut traced the letters onto the papers and cut them out and adhered them with my trusty Cheetah and then filed the excess paper off with the Basic Grey Precision File Set - I also inked the edges of the letters using Quick Quotes Chalk Ink This was a great kit, I had so much product I was able to make cards and do some layouts and also gift card holders with all the scraps !


Wishing you much magic in this holiday season.....and it will happen if you "Believe".

Dee


Wednesday, December 3, 2008

Believe in Bo Bunny!

Hello Friends! And Happy December! If you're not already, it's high time to get into the holiday spirit! And these super cute papers from Bo Bunny Press are just the ticket.

I have to admit, I'm not normally drawn to typical holiday lines... something about them is too "in the box" for my taste. But Bo Bunny's Believe collection just blew my expectations out the window! The colors are so rich and the patterns fun and elegant too. Love them! Here's a couple layouts created with the set, along with other supplies available in the store.


My husband and I. :) For this layout I also used the Believe Cut outs which are wonderful! They make great journaling tags or accents... really with this paper set you are pretty much set to create a handful of fun layouts or cards.


This is our tree from last year, my favorite time of Christmas day is once all the presents have been opened and we can just relax and reflect on the true meaning of the season. On this layout I simply used some Stickles to make the already beautiful title on the paper pop.

Be sure to come by the forum this month to see more and chat with us. I hope you have the most fabulous holiday season ever, and have some time to scrap a bit too! :)

All the best,

Jess

Monday, December 1, 2008

A little bit of "Prudence"

Welcoming December in with Prudence by Crate Paper. This was such a fun pack to work with. It was perfect for a double layout. I used kraft card stock for my base and cut the circle die-cut papers in half-to have some on both pages. I used prudence glitter die cuts, brads and basic grey alphas. I matted the photos with some Bazill card stock.

On this layout I used more of the green tones in the Pudence pack. I cut the die cut sheet to make it the focal point of the layout. The glitter die cuts and brads added sparkle to the layout. And girls do love sparkle!!!
All of these beautiful products can be found in the e-store at WWW.ACBaileyDesigns.com
by:C. Mercer

LinkedWithin

Blog Widget by LinkWithin