Thursday, November 27, 2008

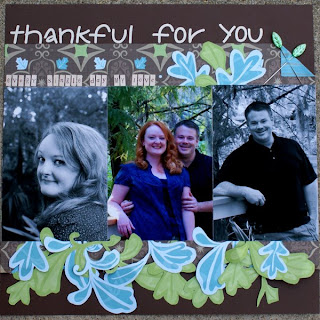
Member Spotlight -- Nicole Polhamus

Tell us a little about yourself and your family.

I am a 34, almost 35 (my birthday is coming up soon) wife and stay at home mom from rural West Virginia. I have three sons, one daughter, two stepdaughters, a husband, and a household that I am in charge of or at least help out with. I am an aspiring writer and although I do have my own online column with my local newspaper, my real dream is to write a novel someday. My other interests include reading, photography, blogging, ATC trading, and pretty much anything artsy crafty.

How and when did you start scrapbooking?

I have no simple answer to this question, as it was a lifelong process that led me to the type of scrapbooking that I do today. When I was very young, my grandmother got me started with the type of scrapbooking where I kept memorabilia and taped it into “scrapbooks.” I still have my first scrapbook, which contains things like my Cabbage Patch doll birth certificate, school papers, little drawing, greeting cards, etc. In addition, I have always kept photo albums. About 5 or 6 years ago, I bought my first scrapbook kit from QVC. At this point, I started adding photos to my scrapbooks, but my pages were very simple, basically photo albums on ugly patterned paper.
In addition, I have always loved art. When I was in my senior year of high school, I only needed two classes to graduate, so my art teacher, who is a wonderful woman that I am still in contact with 16 years later, literally invented classes for me to take in her room. Five of my seven class periods of the day were spent in her room doing projects varying from oil painting on canvas to taking inventory in her supply closet.
My love of scrapbooking and my love of art did not merge with each other until about two years ago when I discovered a few online scrapbooking communities and galleries. I was completely amazed and somewhat intimidated by the incredible things those scrapbookers were doing with their pages. I took it one step at a time, learned one technique at a time, and have came a long way since then. A few weeks ago I started digital scrapbooking and well…. That’s another story.

How would you describe your scrapbooking style?

I don’t have a good answer to this question, because I just don’t know. I do know that I am willing to try any style and any technique at least once. I might consider myself to be very eclectic. Some of my pages are similar, but I don’t have one way that I always scrapbook.

How often do you journal? Is it important to you?

I would say that I journal on about half of my pages. It is important to me if I feel the need to tell the story behind the photos. If I am just playing or being creative then I don’t always add any journaling.

Do you have a dedicated scrap space? What does it look like right now?

Yes, I do have a dedicated scrap space in an extra bedroom. It is a total disaster right now. For the past few weeks, I have only been purging and cleaning. We all know that things get really messy right before they get clean when we take on organizing the scrap room.

What are your "go to" tools or supplies when you scrap?

To get an answer to this question, all would have to do is look at my scrap table and see the things that never ever get put away because I use them so much. In no particular order, it would be my stamps, my chalk inkpads, my glue dots, my Bic mark-its, my rotary trimmer, my Spica clear gel pen, my Cuttlebug, and all of my Bazzill, Basic Grey, and Thickers.

Where do you start when you get ready to create -- sketches, supplies, photos...?

I very rarely start with a sketch unless it is for a challenge. I would say about half the time I start with paper and half the time I start with a photo.

Are you a scrapper or an artist?

Definitely both.

Wednesday, November 26, 2008

More Scenic Route for ya...

First of all.....HAPPY THANKSGIVING!!!

For this month's projects I was given Scenic Route's Melody Lane and matching stickers and chipboard. I have a lot of little girls in my life (1-2 yo Daughter, and 6 neices) so I had plenty of options with this set. The first layout I made Used the papers, a little of the chipboard and my favorite tool and emblishment In Stitchz! I love the added touch that they add. I also did one of my favorite techniques with glossy accents by Ranger. I took some foam thickers, inked them with chalk ink, then covered them with glossy accents to make them have a tile/epoxy look to them. I also created custom flower centers by punching small circles out of coordinating paper, gluing them on then filling the button centers in with glossy accents. If you've never tried this stuff I challenge you to pick some up from the store! There's a turkey day sale going on, 40% off your orders larger than $25! I just picked myself up another bottle and October Afternoon has arrived! Order your's before they sell out!
For my second project I still used the Melody Lane, but I also used Ranger crackle paint. THis stuff is AWESOME! I love the crackle look and the layering and waiting for layers to dry is eliminated! Crackle and paint in one step, how genius! Thanks for stopping by, but now run to ACBailey Designs and get your sale items while they're still in stock!

Tuesday, November 25, 2008

November 25th

A few weeks ago, I sat down and started to update my calendar, and I was really flabbergasted. I only have one page left in my calendar—next month will be December, which means 2008 is almost over! I can’t believe it, but it’s here and you know what my second thought was (the first had to do with holiday shopping)? That I didn’t meet my self-imposed scrapbooking goal for 2008!

One thing that cheered me up, though, was talking to and seeing the work of some of the other Design Team girls here at ACB! They’ve got so many wonderful ideas, and AC Bailey carries such incredible products, that I actually made some gifts and got a ton of layouts done in November alone!

My first project was a Fall layout using “Three Bugs In A Rug” papers that came in our November Kit of the Month. I used pictures of my son’s Cub Scout trip to a pumpkin farm and corn maze. I loved having the end of the title, “Pumpkin Patch,” being a part of the paper. It was also so versatile I accented it with Bazzill card stock, American Crafts foam “Thickers”, and some buttons.


My next project is called “Uncle Shucks,” and it’s a fun little twist on one of our November sketches. I actually used pictures from the same trip to the pumpkin patch/corn maze for my younger son’s album! Honestly, the moment I saw the Crate Paper "Lemongrass" paper and embellishments, I knew exactly what I was going to do with them. It was a completely different feel for the same basic set of pictures using the Crate Paper papers, brads and Glitter Border Strips. I threw in some Bazzill card stock, chipboard circles and ink, and voila! Two totally different layouts from the same trip, for two totally different kids!


Finally, I did a second layout using the Lemongass products. This layout is called “16 Weeks” and is a weekly pictorial of our house as it was being built. Although we moved back in February, I hadn’t found a way to depict the journey in a layout until I saw our fabulous November Sketch of the Month by April Ordonez. Combined with the rest of my Lemongrass products, I came up with this:


So check out the projects here, in our newsletter and in our gallery, and if you can find ways to incorporate them into your holiday gift list, you’ll be that much more ahead of the game. If not, at the very least you’ll get some inspiration for your projects!

Happy Thanksgiving!
--Kathy

Sunday, November 23, 2008

This was a really fun month for supplies. This line from Scenic Route -- Spain Street -- is very versatile and so much fun! It is great for those fall photos and I loved all the coordinating stickers and chipboard embellies. They were perfect for the ideas I had in mind.

This first layout is a picture I have been hanging on to since July. My husband and I don't have many pictures together so this one meant a lot. Plus, he is actually smiling and I am pretty satisfied with how I look. :) I have wanted to scrap it for a while but didn't have the right paper until I got this line. It worked out perfectly. I tried out a cleaner, more linear look and I really like how it turned out.

I also used this line on a card that I made. I am pretty happy with how it turned out. My goal lately has been to use scraps to create cards that I can keep for times when I need to be able to grab a card. So far, so good! This card also uses a chipboard embelly, American Crafts ribbon, and Bazzill flowers. The cute little fuzzy brad is by Creative Imaginations. Those sure make adorable flower centers!
Finally, I created a mini album with the paper set. I LOVE LOVE LOVE how it turned out. The colors just seemed to work so well with my pictures. I used a Maya Road mini album for this project. You can find other Maya Road album in the store. (Maya Road Albums) There are lots of things to choose from and they are a lot of fun to play with! This album was pretty simple to complete. Each 2 page spread has one side covered in a photo and the other side covered in coordinating paper and embellies. I think the thing I liked most about this paper line is that the embellies that come with it are so easy to use. There seemed to be a sticker or chipboard piece that worked well with the photo I was using.
If you are thinking about getting this line, I would highly reccomend it! These papers would be great for those Thanksgiving pictures we are all sure to have next week. Better get to the store and grab some before it's gone! Have a great holiday and be sure to share those pics!

Wednesday, November 19, 2008

Melody Lane is singing my song...

I LOVE this line from Scenic Route! From the minute I opened the package I knew this paper was special and I could do special things with it. Check out these layouts!

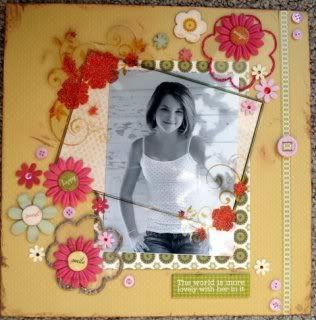
The first is a layout using goodies from the Melody Scenic Route line besides the paper, like stickers and chipboard. I started with A Bazzill dotted swiss background (one of my new favorites) and added LOTS of flowers, acrylic flowers, Bazzill flowers, Petaloo foam and paper flowers as well as bulk buttons (I love that they are sold in the store like that) and a Fancy Pants transparency. Then I distressed and inked everything up! I decorated the acrylic flowers with Ranger Dimensional Pearls too so the edges are accented -love the look that gave us!


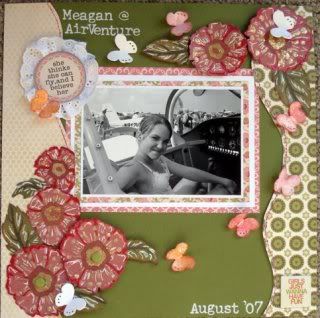
Then I created the second layout. The sayings on the Little Princess stickers and Baby cakes chipboard are precious and I new when I read the sticker that said "She thinks she can fly and I believe her" I had to scrap this pic I had of Meagan sitting in a cockpit of a plane from last summer's trip to Osh K'Osh Wisconsin. Since the colors were wrong, I converted it to black and white and that started me on the road to altering EVERYTHING! I cut the matching flowers off the Kraft Cardstock Pink Garland and I altered them with Dimensional pearls in red, a Uniball pen doodling and some stickles. I gave them green velvet centers by using the CI brads and I altered the sticker title to make it stand out more by mounting in on a metal rimmed tag and attaching scrap lace from my stash on the back. I placed the flowers and tag onto my layout by using pop dots for occasional dimension. I latered the patterned paper I added by using BOTH sides of the two-sided sheet on the edges and I stitched on it with faux stitching and pink "thread" - then I cut the butterflies loose from the Bazzill just the edge butterfly border (I love these) and altered them! I created my own embelishments by first distressing them with cat's eye chalks and Powdre puff inks and let that dry, then I added stickles to all of them to make them sparkle and shine and when that was dry I coated them in Ranger glossy accents and as it dried the butterflies curled like in flight! I attached them in a flying "string" and tossed in a few unaltered ones for added effect and they look AWESOME! You all have GOT to try this easy way of creating custom embellishments...you too will love it and create one of a kind layouts. And, EVERYTHING I used is available in the AC Bailey online store RIGHT NOW!!! Enjoy,...and happy scrapping!
Gail

Monday, November 17, 2008

A little more Scenic Route...

This month I worked with 2 different paper sets from Scenic Route: Grafton and Madera. Both are beautiful and such fun to work with.

This first layout was created with the Madera Line and the Happy Together Chipboard. This was a breeze to put together using the Strips. I also sanded the edges of the chipboard to add a little texture.

Tip: If you have a lot of photos you want to include, make a few of them smaller before you print them. Then combine the smaller photos with a larger focal point, and you have a great base for your layout.


This second one is using the Grafton Line. Gotta love those cute little waves and the surfboards!

Saturday, November 15, 2008

Holiday Table Bling

By know we have all planned our Thanks Giving Dinners invited the guests. But how about the table will you deck it out for your guests?

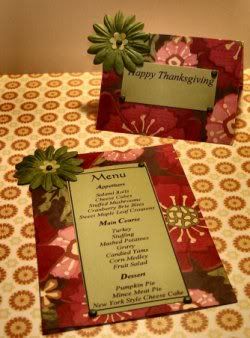
To be honest I have never really given my table much thought until I join AC Bailey Designs and the Wonderful Design Team posted a challenge that had to do with table decorations. I did some research and came up with a simple set of table place cards and a menu for my guest.

Photobucket

I used the Spain Street. Paper set , Bazzill lizard Green Cardstock , the 2' Bazzill Daisey Paper Blossoms and the America Craft mini brads.

Cut your menu cards 4" Wide by 6.0" Long your center card should be 2.5" wide by 4" Long. You can type your menu on your computer and print it on your solid cardstock. I used MS Publisher but use what ever program you use dailey. Cut your solid cardstock to 4" by 11" print your menu then cut the menus to size and adhere them to the center of the larger paper and embellish it as you wish.

I found this project to be so fun and easy. Give it a try I think you will be amazed how much fun this can be.

You can also use the different papers in the set to decorate candles or make a center piece as well as make labels for you different dishes on a buffet.

Photobucket

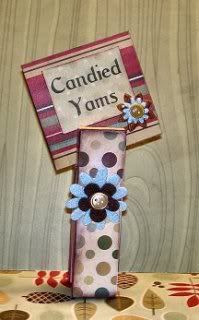
I made some labels for my buffet using the Goodie Kit of the Month and the Diane 5" Clothespins . If you would like to learn how to decorate the clothes pins you can purchase our Simply Done Kit - Altered Clothespin.

After the Dinner you can give these clothespins to your guest as gifts to remeber the wonderful time you shared together. They make great photo or recipe holders.

There is so much to learn form the Design Team at AC Bailey Designs we would love to share with you. Come join us at the AC Bailey Designs Forum and we will be glad to help you decorate your holiday!

Have a Great Holiday!!

Emma aka Auntie Em.

P.S. Stop in and say hi!!

Friday, November 14, 2008

Fantastic Scenic Route!

Hi Everyone, Elisabeth here - This month I received the beautiful Madera Drive papers by Scenic Route to create with and I have to say, you can never go wrong with Scenic Route...they're papers are always easy to work with and go well with whatever style you want to scrap; from simple to elegant to vintage and distressed. First off, I made this mini book using the awesome Basic Grey Chocolate Chipboard book as a base:


Since I was in a fall mood from all the pumpkin patch pictures, I decided to make a simple "Happy Autumn" card


Inspired by April's November layout Sketch I created this layout. The journaling is about how I bribed my 17 year old son to let me have 15 minutes for a photo shoot..no whinning allowed...I took good advantage of the time and got over 100 photos!


With the leftover scraps and some border punches, I created these fun hostess gift boxes for the Great Pumpkin Contest. You can download the template here!


Thanks for looking everyone and I'll see you on the ACBailey Boards!

Thursday, November 13, 2008

Thinking Outside of the Box (or your product ;)

Hello! Leah from the team checking in today!
When I received the Laxton Street papers from Scenic Route to create some of my projects to share this month, I was immediately drawn to the fun waves and surf boards - and created this layout:

Inspired by those vintage type postcards you'll find along the beach!

But if you take a closer look at this playful, summery set, you'll also see some fabulous patterns for Fall themed layouts and scrapping! Of course these Bowtell Street papers were the perfect mix!

Cards:


And with the scraps I had left, these bright and colorful placecards


Have a fabulous Thursday! Hope these projects encourage you to look beyond the "theme" of a paper/product - to see their potential!

Tuesday, November 11, 2008

More Chatterbox Botanico

I have been a Chatterbox fan since the good ol' days, so it was fun to get to play with some of their new product. The Botanico collection is so pretty with its shades of blue, green and brown. Here is a layout that I created using the Botanico collection, some Sassafras Lass buttons, Bazzill blossoms and Maya Road velvet rickrack, all available in the AC Bailey online store.


Sunday, November 9, 2008

November LO Sketch

April here again, I totally forgot to post our sketch for this month on the blog on the 5th so here it is! I don't want you all to miss out on this one because it's lots of fun and it posses endless possibilities!


And here are a few layouts that myself and the DT created using it:
Let's Make a Deal by Elizabeth
Home by Jessica
And a digi layout by me

If you are interested in the digi template of the sketch or even joining in the fun and creating a layout, check out the forum HERE. You will need to be registered on the forum in order to view the thread, as well as participate. It would great to have you join in so stop by!!

Oh Boy! *Adorable digi CD*

April here bringing you my very first set of product inspiration as a DT member!!!! I first have to say that I am over the moon excited that I got to play with this CD because it was so much fun! I had to actually stop myself because I just couldn't put it away!

First here are a few digi layouts I made using the kits on the Oh Boy CD:
*Using the Good Sport kit on the CD: For this one I blended a photo on the left and then using the cookie cutter tool in PSE I cut stars out of some of the digi papers in the kit, and added outlines in two different colors around them (by going to Edit - Stroke (outline) selection in PSE).

*Using the All Natural kit from the CD as well as the super fun Sunnyday Hand Fonts by our very own Ginnifer:

*Using the Tool Time kit from the CD as well as the Sunnyday Hand Fonts:
Then these digi cards I created using each of the kits on the Oh Boy CD, very easy to create and a great bonus is that you can print up as many as you'd like without the extra effort of creating them all by hand!


Then one thing that I love is altering and creating gifts so I couldn't resist in using the Little Boy kit (which is so stinking adorable) from the Oh Boy CD as well as the cute dingbats from the Sunnyday Hand Fonts and creating a gift set that I plan to gift to a friend who is expecting a little boy. The set includes blank digi cards, gift tags, and envelope labels:

Credits:
All digi items from the Oh Boy CD from Digital Scrapbook Memories
Fonts from the Sunnyday Hand Fonts set

TFL and I hope I've inspired you a bit!

Friday, November 7, 2008

Super Quick and Easy Mini Album


When I got my box of design team goodies for this month, I was so drawn to the fabulous sheet of Creative Imaginations "Trickery" cardstock journaling stickers. LOVE them!!
I knew I would have to use them to make some sort of mini album. So...I did!! I printed some orange paper from the Digital Scrapbook Memories "In the Mood" CD and also a date stamp from the same CD. Then I got to work on my book. I used some orange, copper, and stardust Stickles throughout the book for a little pop. And some yummy Basic Grey "Offbeat" papers...some Creative Imaginations Cardstock stickers and some CI Trickery ribbon as well. I made this little mini all about my daughter's costume and why she chose it. It was so easy and quick to put together. There are eight journaling stickers so I stuck two together to make a page so I ended up with four pages. And just a little sidenote...those things are super sticky so make sure you have them lined up before you put them together. Once they come in contact with each other, there's no getting them apart without injuring one or both of the stickers. And the prompts on the stickers are perfect for making a little album about your child's costume...super easy! And the Cropadile goes through the pages like butter...so easy! And my daughter just loves to look at this little album that's all about her.


You can see the rest of the pages in the gallery at AC Bailey. And I've also uploaded some new digital pages and a new hybrid page! Yay! Have a nice day!! Thanks for stopping by!!
~Phoebe


Wednesday, November 5, 2008

Tag - You're It!!


These little Maya Road chipboard tag books are such fun to make. Tag books are a wonderful way to use scraps, mix paper patterns and use the photos that don't make it onto a 12x12 layout. They are a fun way to document a day in your life without alot of fuss. They make wonderful little gifts for the grandparents too! The tags, when used separately can be used on layouts, as gift tags or place cards for your holiday table!

To make this little tag book, I selected my papers and traced the tag shape and cut them out. After using chalk ink (which dries immediately) on the edges of the tags, I adhered the paper to the tag using the Xyron Cheetah - http://acbaileyltd.com/cart2/products/2_Cheetah-19-0.html.
The papers I used are by 3 Bugs in a Rug which I received along with the tag book and lots of other scrapping goodness in the ACBailey November Kit of the Month, which you can see here - http://acbaileyltd.com/cart2/products/November_KOTM-1155-0.html. I also used Coredinations cardstock as accent paper. This cardstock is fantastic - it has a colored core and looks fantastic sanded, torn or distressed. Once you try it it will become one of your scrapping Must Haves! One your tag book is put together, add your photos, journaling, embellishments and some fibers and ribbon and you've got a great little memory book!
The holidays are just around the corner - Maya Road has an adorable Star shaped mini book that would be a great way to use your holiday card scraps and get some home made gifts completed! Check it out
Wishing you much to be Thankful for,
Dee


Monday, November 3, 2008

Chatterbox Botanico Line

This month I got to play with my new favorite line from Chatterbox. The Botanico collection!


I love the colors in this line so much, they really bring a richness to black and white photos. Not only this, but the coordinating embellishments that Chatterbox has put out to go with the papers are adorable!

Such as these journaling spots (which have a very fun sheen to them!):


And these chipboard words - which are already layered for you! So easy!:

You can of course find all of these and more in the store. Here's a quick link to get you there fast!

I hope you are having a lovely Autumn so far - there have been so many exciting things happening at the site and store the past month, stop by and say hello, we'd love to see you! Don't forget the Great Pumpkin Search continues through the middle of this month as well with our Dress your Table round... there are some really adorable projects for you to create!
Have a wonderful November and Happy Thanksgiving - until next month!
All the best,
Jess

Saturday, November 1, 2008

Scenic Route/Laxton Street


Scenic Route/Laxton Street paper is so fun to work with and is an absolute favorite of mine. I had a blast using these colorful, bright papers. They are especially great for busy little boys, as you will see in my layouts. The papers are double sided which is an added plus. So many options and so many different ways to add more color into your layout. I also used Thickers by American Crafts, Bazzill card stock, SR Grafton die cuts, Sassafras buttons and glue dots. All of these products can be found at http://www.acbaileydesigns.com/ so go check it out and get ready to be inspired.
by: C. Mercer

LinkedWithin

Blog Widget by LinkWithin